
Zendesk consistently rolls out new features, and keeping up can be a challenge. We’re here to cut through the noise and give you our expert take on what actually matters for your CX operations.
Zendesk’s New User Permission: A Welcome Step Towards Safer Delegation
What We Think:
This is a small but mighty update that addresses a long-standing security gap. The new permission to manage end-user settings allows admins to delegate specific responsibilities to team leads or managers without handing over the keys to the entire kingdom. It’s a fantastic move for enhancing security and operational efficiency. Our only reservation is that the permission is an all-or-nothing deal; you can’t pick and choose which settings to delegate. Overall, it’s a significant improvement for mature Zendesk instances where the principle of least privilege is paramount.
The Reality Check: What’s Actually Changing?
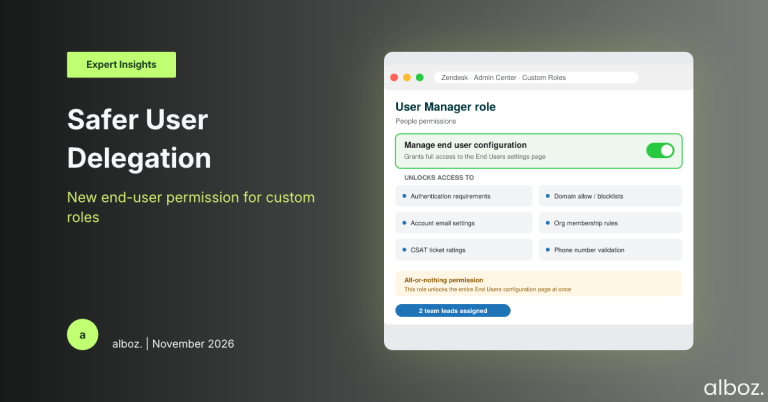
Let’s break down what this announcement from Zendesk really means. Starting October 15th, 2026, you’ll find a new permission available within your custom roles called “Manage end user configuration”.
When you grant this permission to a custom role, any team member assigned that role will gain full access to the ‘End Users’ configuration page, located in Admin Center > People > Configuration > End Users. This isn’t just one or two settings; it’s the whole shebang. The user will be able to modify:
- Ticket submission and authentication requirements
- New user registration options
- Domain allowlists and blocklists
- Account-wide email settings
- End-user profile and password editing capabilities
- User and organisation field settings
- Phone number validation rules
- Organisation membership rules
- Customer satisfaction (CSAT) ticket ratings
The crucial thing to understand here is that this permission is a single switch. You cannot grant access to manage *just* the allowlist while restricting access to authentication settings. It’s an all-or-nothing package for this entire configuration page.
Our Expert Opinion: The Power of ‘Least Privilege’
Zendesk’s stated reason for this change is to allow organisations to delegate responsibility without granting broad administrative functions. Our expert opinion is that this hits the nail on the head. For years, we’ve seen clients struggle with a common dilemma: a team lead needs to manage the blocklist for their department’s end-users, but the only way to grant that access was to make them a full admin. This meant they also had access to billing, product configurations, and other highly sensitive areas.
This new feature directly addresses the principle of least privilege, a cornerstone of good security practice. It ensures that users only have access to the information and functions essential to perform their jobs. This is a big win for larger organisations, enterprises, or any company with stringent security and compliance requirements. You can now empower your managers to handle day-to-day user management tasks safely. However, the all-or-nothing nature of the permission is a significant caveat. Granting someone the ability to change authentication requirements is a major security decision. It’s why a clear strategy for your Zendesk User Permissions is more critical than ever.
This change moves Zendesk further towards the granular control needed for complex, multi-team environments. While we’d love to see even more granularity in the future (e.g., separate permissions for each setting on the page), this is a very solid and much-needed step in the right direction for managing Zendesk User Permissions effectively.
How We’d Handle the Rollout: A Phased Approach
This is a powerful permission, and we wouldn’t recommend simply switching it on for existing roles. A careless rollout could inadvertently create security vulnerabilities. Here is what we’re advising our clients to do, broken down into a practical checklist:
| Phase | Action Item | Key Consideration |
|---|---|---|
| 1. Audit & Identify | Review your current list of admins. Identify anyone who has full admin rights primarily to manage the settings covered by this new permission. | This is an opportunity to reduce the number of full admin licences, which is a major security win. Can their roles be downgraded? |
| 2. Define & Create | Do not modify an existing, live custom role. Instead, create a new custom role specifically for this purpose (e.g., “User Manager”) or clone an existing Team Lead role for testing. | Isolating the change in a new role prevents unintended consequences for your current agent permissions structure. |
| 3. Document & Train | Before assigning the new role, document the function of every setting on the End Users configuration page. Provide training to the intended recipients. | They must understand the security impact of changing authentication settings or altering blocklists. Ensure they know what they are responsible for. |
| 4. Pilot & Monitor | Assign the new, carefully defined role to a single, trusted manager or team lead as a pilot. Use the audit log to monitor the changes they make. | A small-scale test will highlight any misunderstandings or process gaps before a wide-scale rollout. Check for both expected and unexpected changes. |
| 5. Full Rollout | Once the pilot is successful, roll out the new custom role to the wider group of intended managers. Update your internal documentation on Zendesk User Permissions. | Communication is key. Ensure everyone understands their new capabilities and the guardrails in place. |
In summary, this update is a valuable addition to the Zendesk User Permissions toolkit. It provides a much-needed layer of delegation that can improve both security and operational agility. By empowering trusted team members without over-privileged access, you can distribute administrative workload more effectively. However, the scope of this permission demands a thoughtful and cautious implementation plan. If you need help structuring your roles and permissions, reach out to your alboz. Solution Consultant.


